
# Web Application Frameworks
This walkthrough shows how to add Storyly to your web application and show your first story in it.
Before you begin
Please login into Storyly Dashboard (opens new window) and get your instance token. You can get your token from the Storyly Dashboard -> Settings -> App Settings (opens new window)
# Basic Installation
If you do not use any framework you can simply import and init Storyly by copying below lines to your web app, please remember to replace <YOUR_TOKEN_HERE> with your own.
<script custom-element="storyly-web" src="https://web-story.storyly.io/v2/storyly-web.js"></script>
<storyly-web></storyly-web>
<script>
    const storylyWeb = document.querySelector('storyly-web');
    storylyWeb.init({
      token: '<YOUR_TOKEN_HERE>',
    });
</script>
Just hit the run. Now, you should be able to enjoy Storyly 🎉!
# Layout
There are 2 different Layouts that you can choose in between.
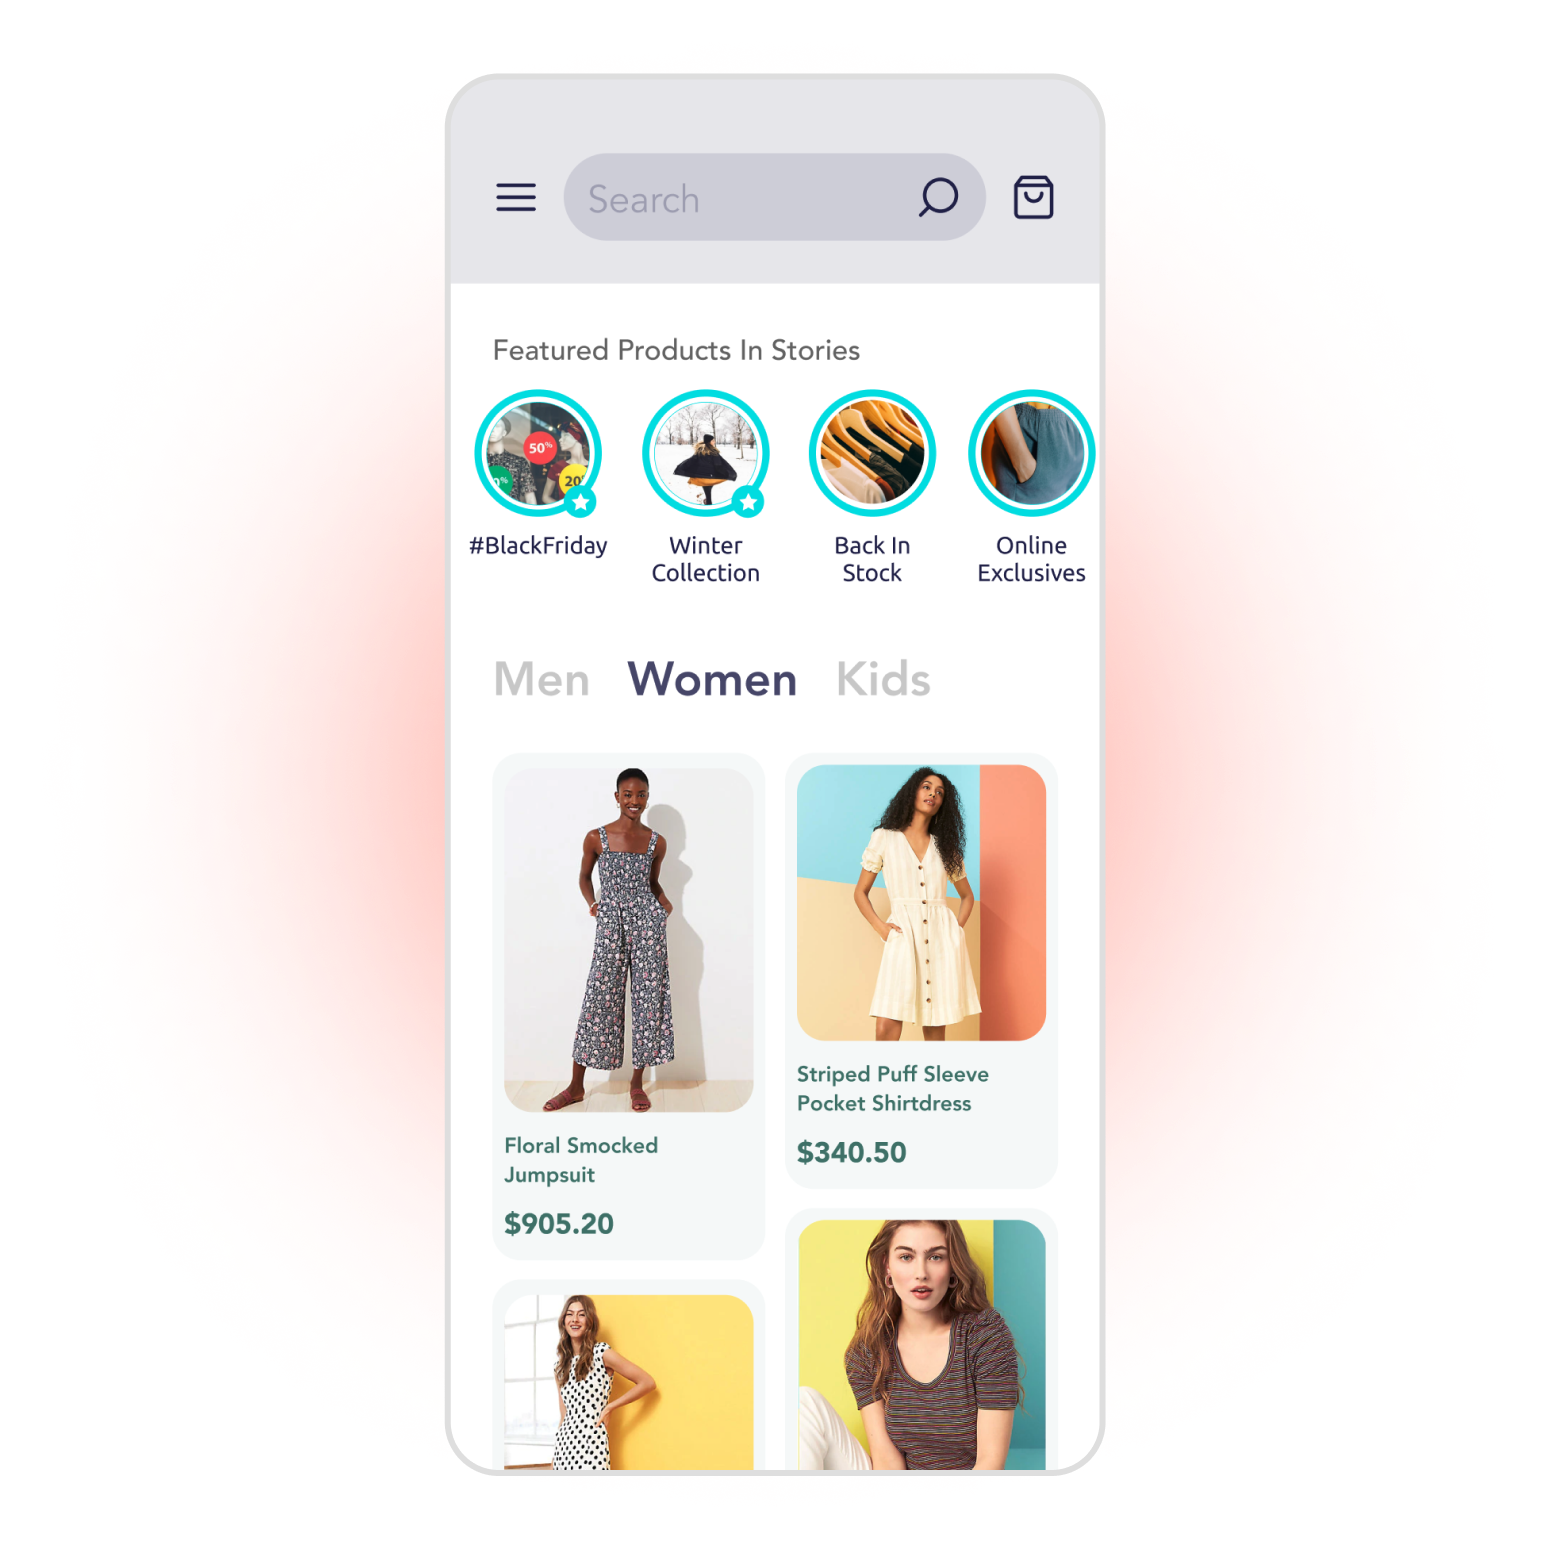
Here is the Modern Layout:
In order to use the Modern Layout, set the layout parameter as:
storylyWeb.init({
  ...
  layout: 'modern',
  props: {...},
});
TIP
Modern Layout is the default layout. If you do not set this parameter, you’ll have the Modern Layout by default.
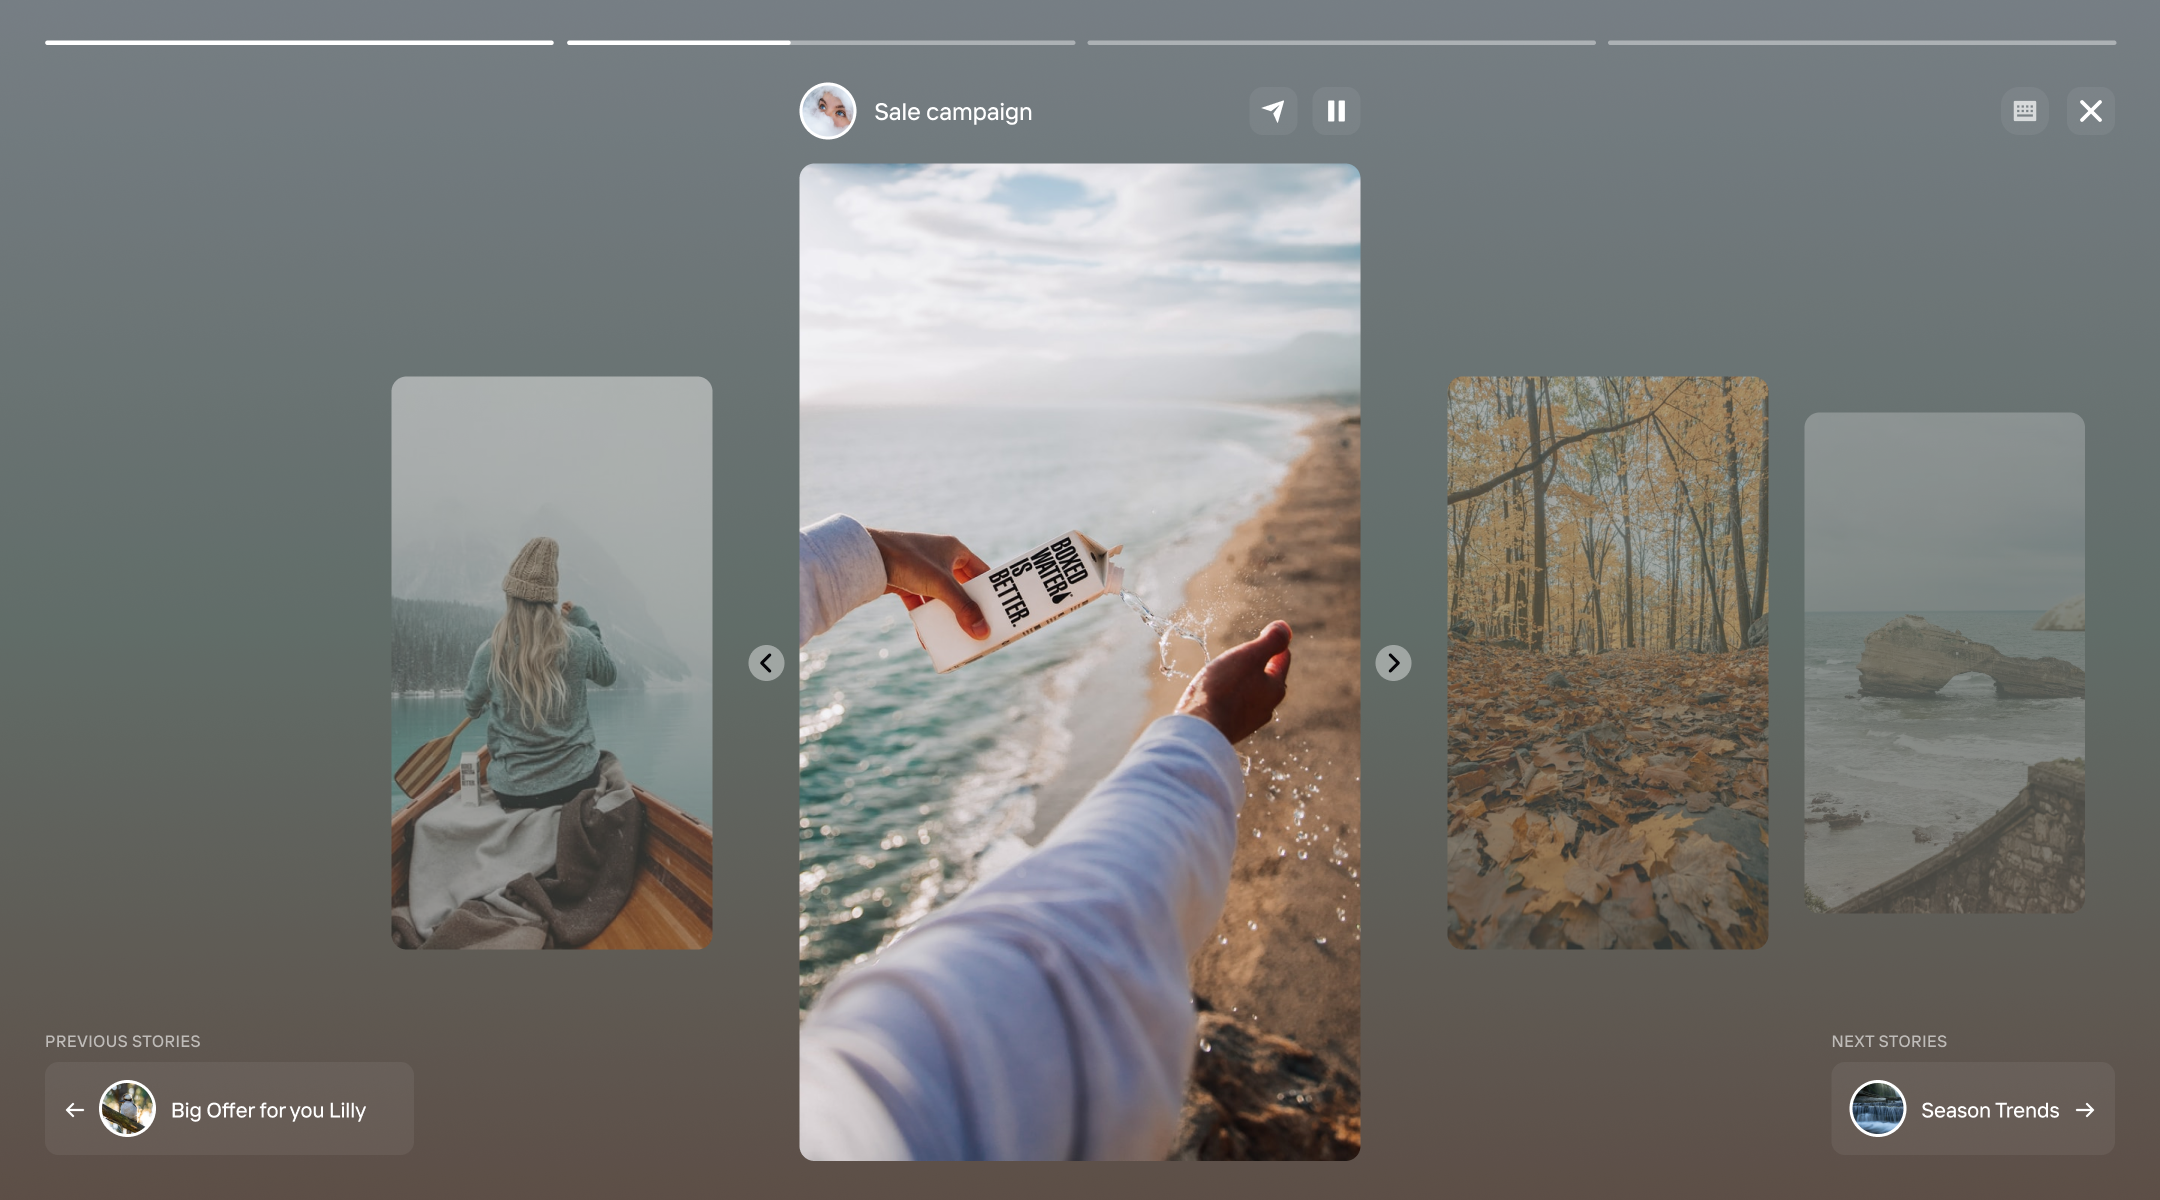
As the 2nd option, here is the Classic Layout:

In order to use the Classic Layout, set the layout parameter as:
storylyWeb.init({
  ...
  layout: 'classic',
  props: {...},
});
# React
First of all you need to insert storyly-web.js inside your html body,
<script custom-element="storyly-web" src="https://web-story.storyly.io/v2/storyly-web.js"></script>
and then you need to put below tag to the page where you want to show your stories.
<storyly-web ref={storylyRef} />
Finally you can initialize Storyly in your useLayoutEffect lifecycle event. Please remember to replace <YOUR_TOKEN_HERE> with your own.
const storylyRef = useRef();
useLayoutEffect(() => {
  storylyRef.current.init({
    token: '<YOUR_TOKEN_HERE>',
  });
}, []);
# Vue
First of all you need to insert storyly-web.js inside your html body,
<script custom-element="storyly-web" src="https://web-story.storyly.io/v2/storyly-web.js"></script>
and then you need to put below tag to the page where you want to show your stories.
<storyly-web ref="storylyWeb"></storyly-web>
Finally you can initialize Storyly in your mounted lifecycle event. Please remember to replace <YOUR_TOKEN_HERE> with your own.
<script>
export default {
  mounted() {
    this.$refs.storylyWeb.init({
      token: '<YOUR_TOKEN_HERE>',
    });
  }
}
</script>
# Angular
Storyly is implemented as a web component so you need to enable custom elements schema in your configuration.
@NgModule({
  ...
  schemas: [ CUSTOM_ELEMENTS_SCHEMA ]
})
Then you need to insert storyly-web.js inside your html body,
<script custom-element="storyly-web" src="https://web-story.storyly.io/v2/storyly-web.js"></script>
and then you need to put below tag to the page where you want to show your stories.
<storyly-web #storylyweb></storyly-web>
As the last step you need to initialize your component. Please remember to replace <YOUR_TOKEN_HERE> with your own.
import { AfterViewInit, Component, ElementRef, ViewChild } from '@angular/core';
@Component({
  ...
})
export class AppComponent implements AfterViewInit{
  @ViewChild("storylyweb") storylyWebDom!: ElementRef;
  ngAfterViewInit(){
    this.storylyWebDom.nativeElement.init({
      token: '<YOUR_TOKEN_HERE>',
    });
  }
}
WARNING
If you can't see Storyly in your website, please check that your token is correct. For more details please check console logs.