
# User Attributes as External Data
You can use Personalized Stories for birthdays, personal offers by his or her name of a specific user, rewards and so on. This guide shows how to create templates and fill the templates from the Web SDK.
Before you begin
You need to have the working Storyly integration as described in Initial Web SDK Setup.
This guide shows creation of 2 different Stories with different templates.
# Create Templates
In the Storyly Dashboard, while creating story groups, you will see an option called Create Personalized Stories. Here you can either select an existing template or create a new one in Template Studio.
WARNING
Be sure to define unique field names for each story groups in order to not to have problems while filling the templates in the application.
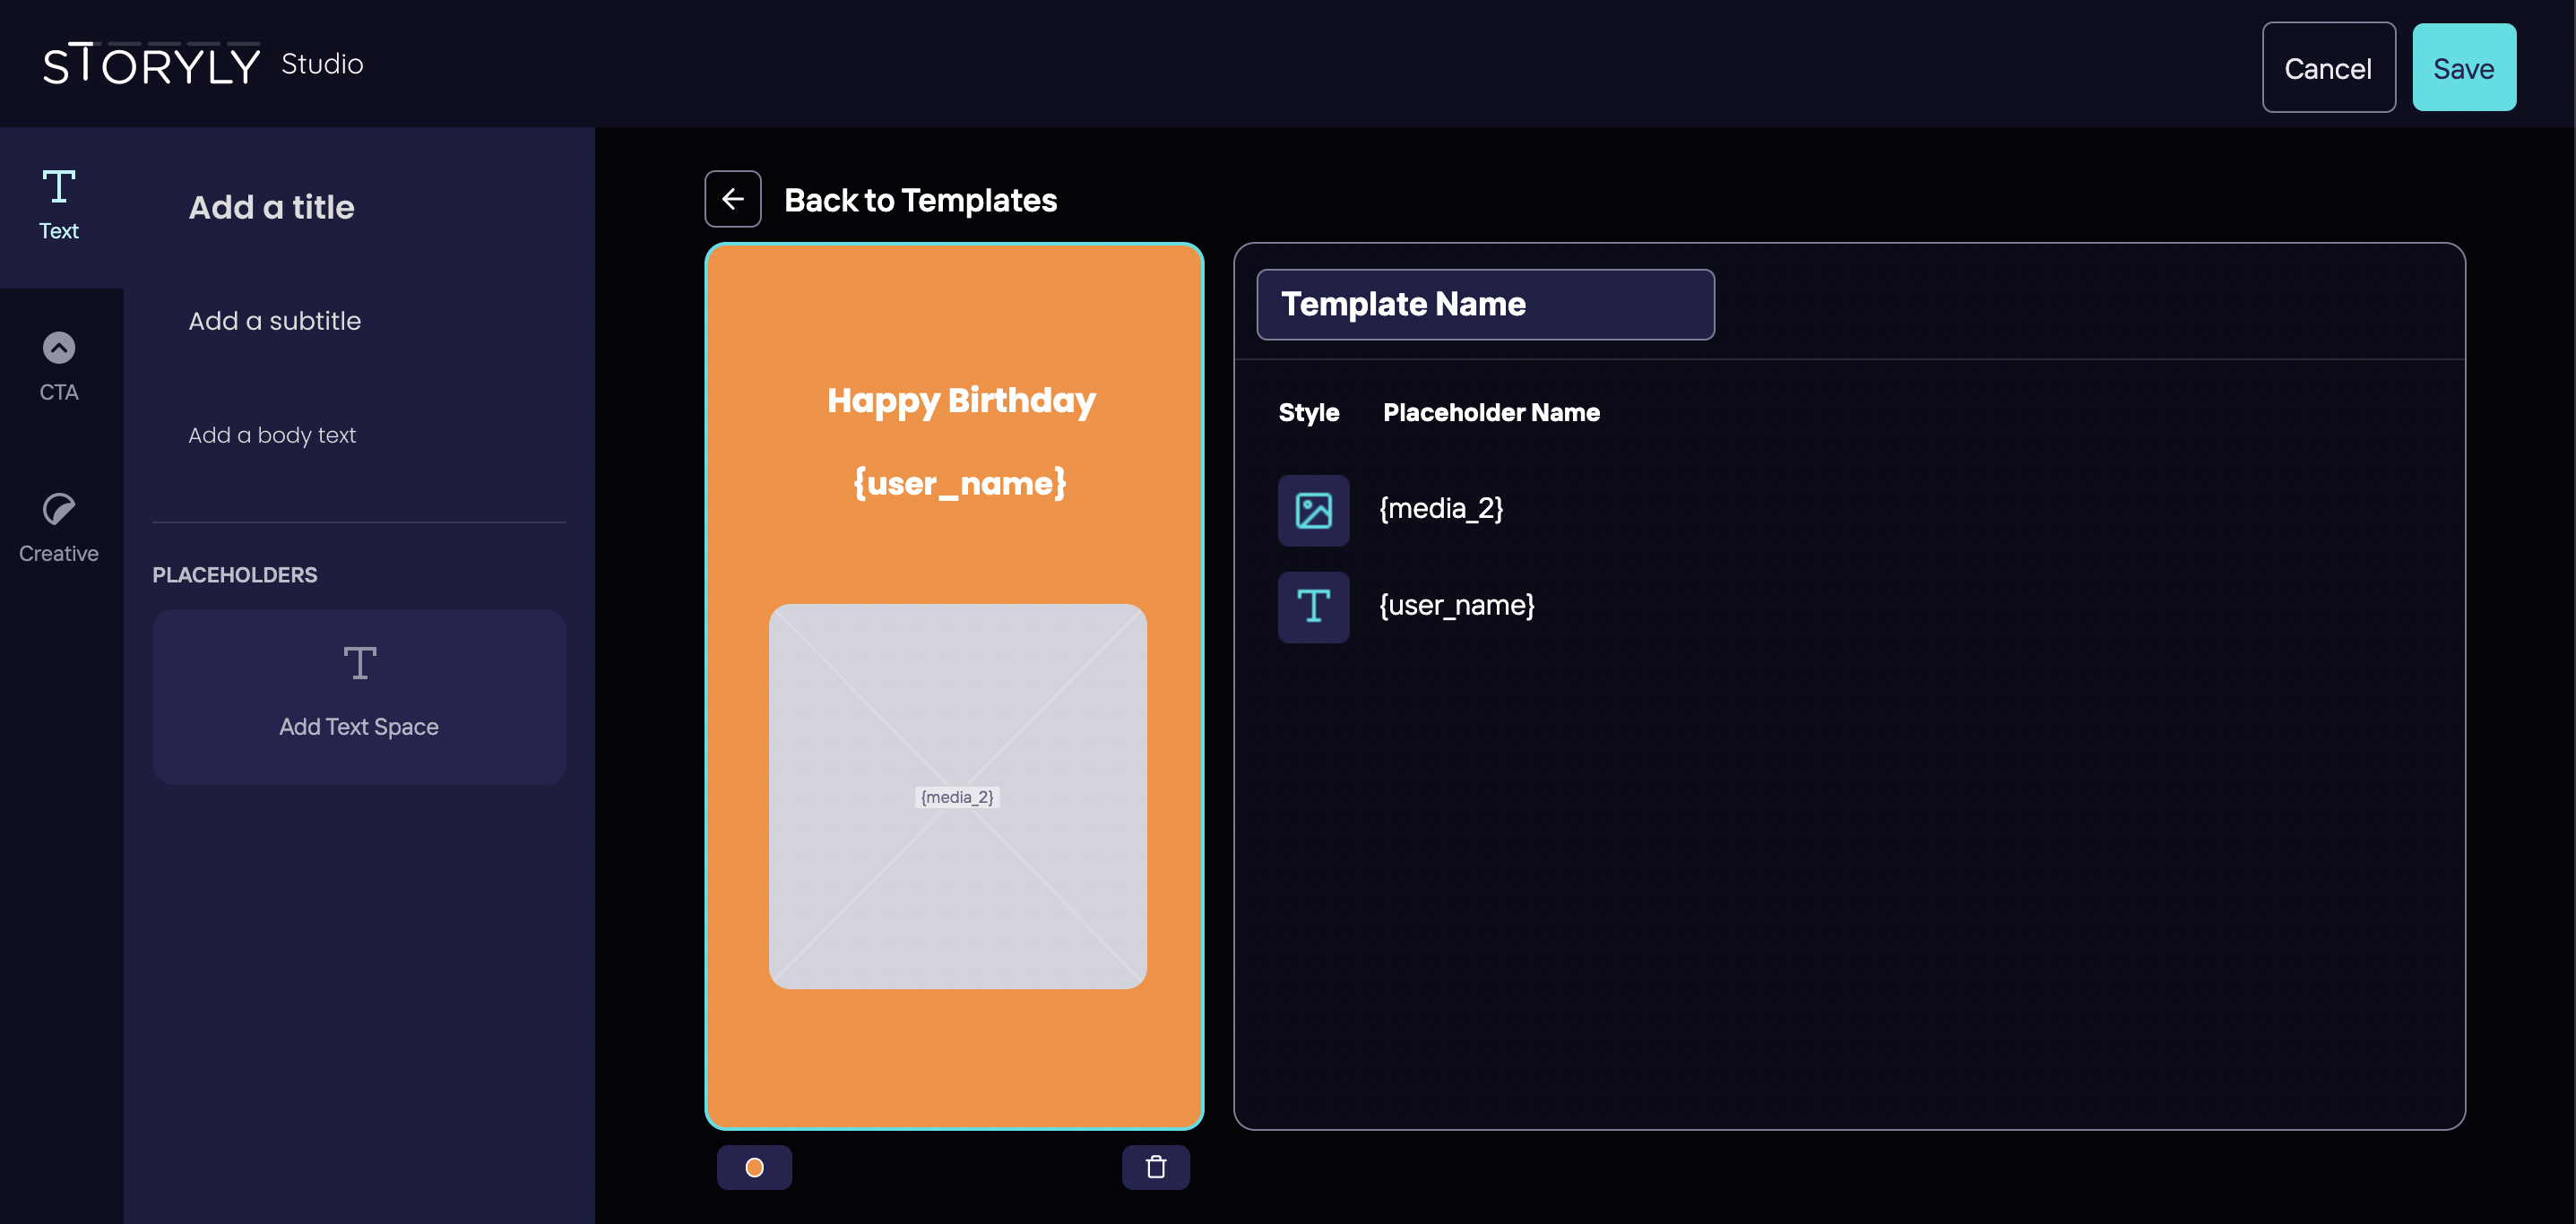
Assume that your first template is a Birthday Story Template and consists of the following user-defined keys;
- image layer to show image of birthday with
{media_2}field, - text layer to show user names with
{user_name}field,
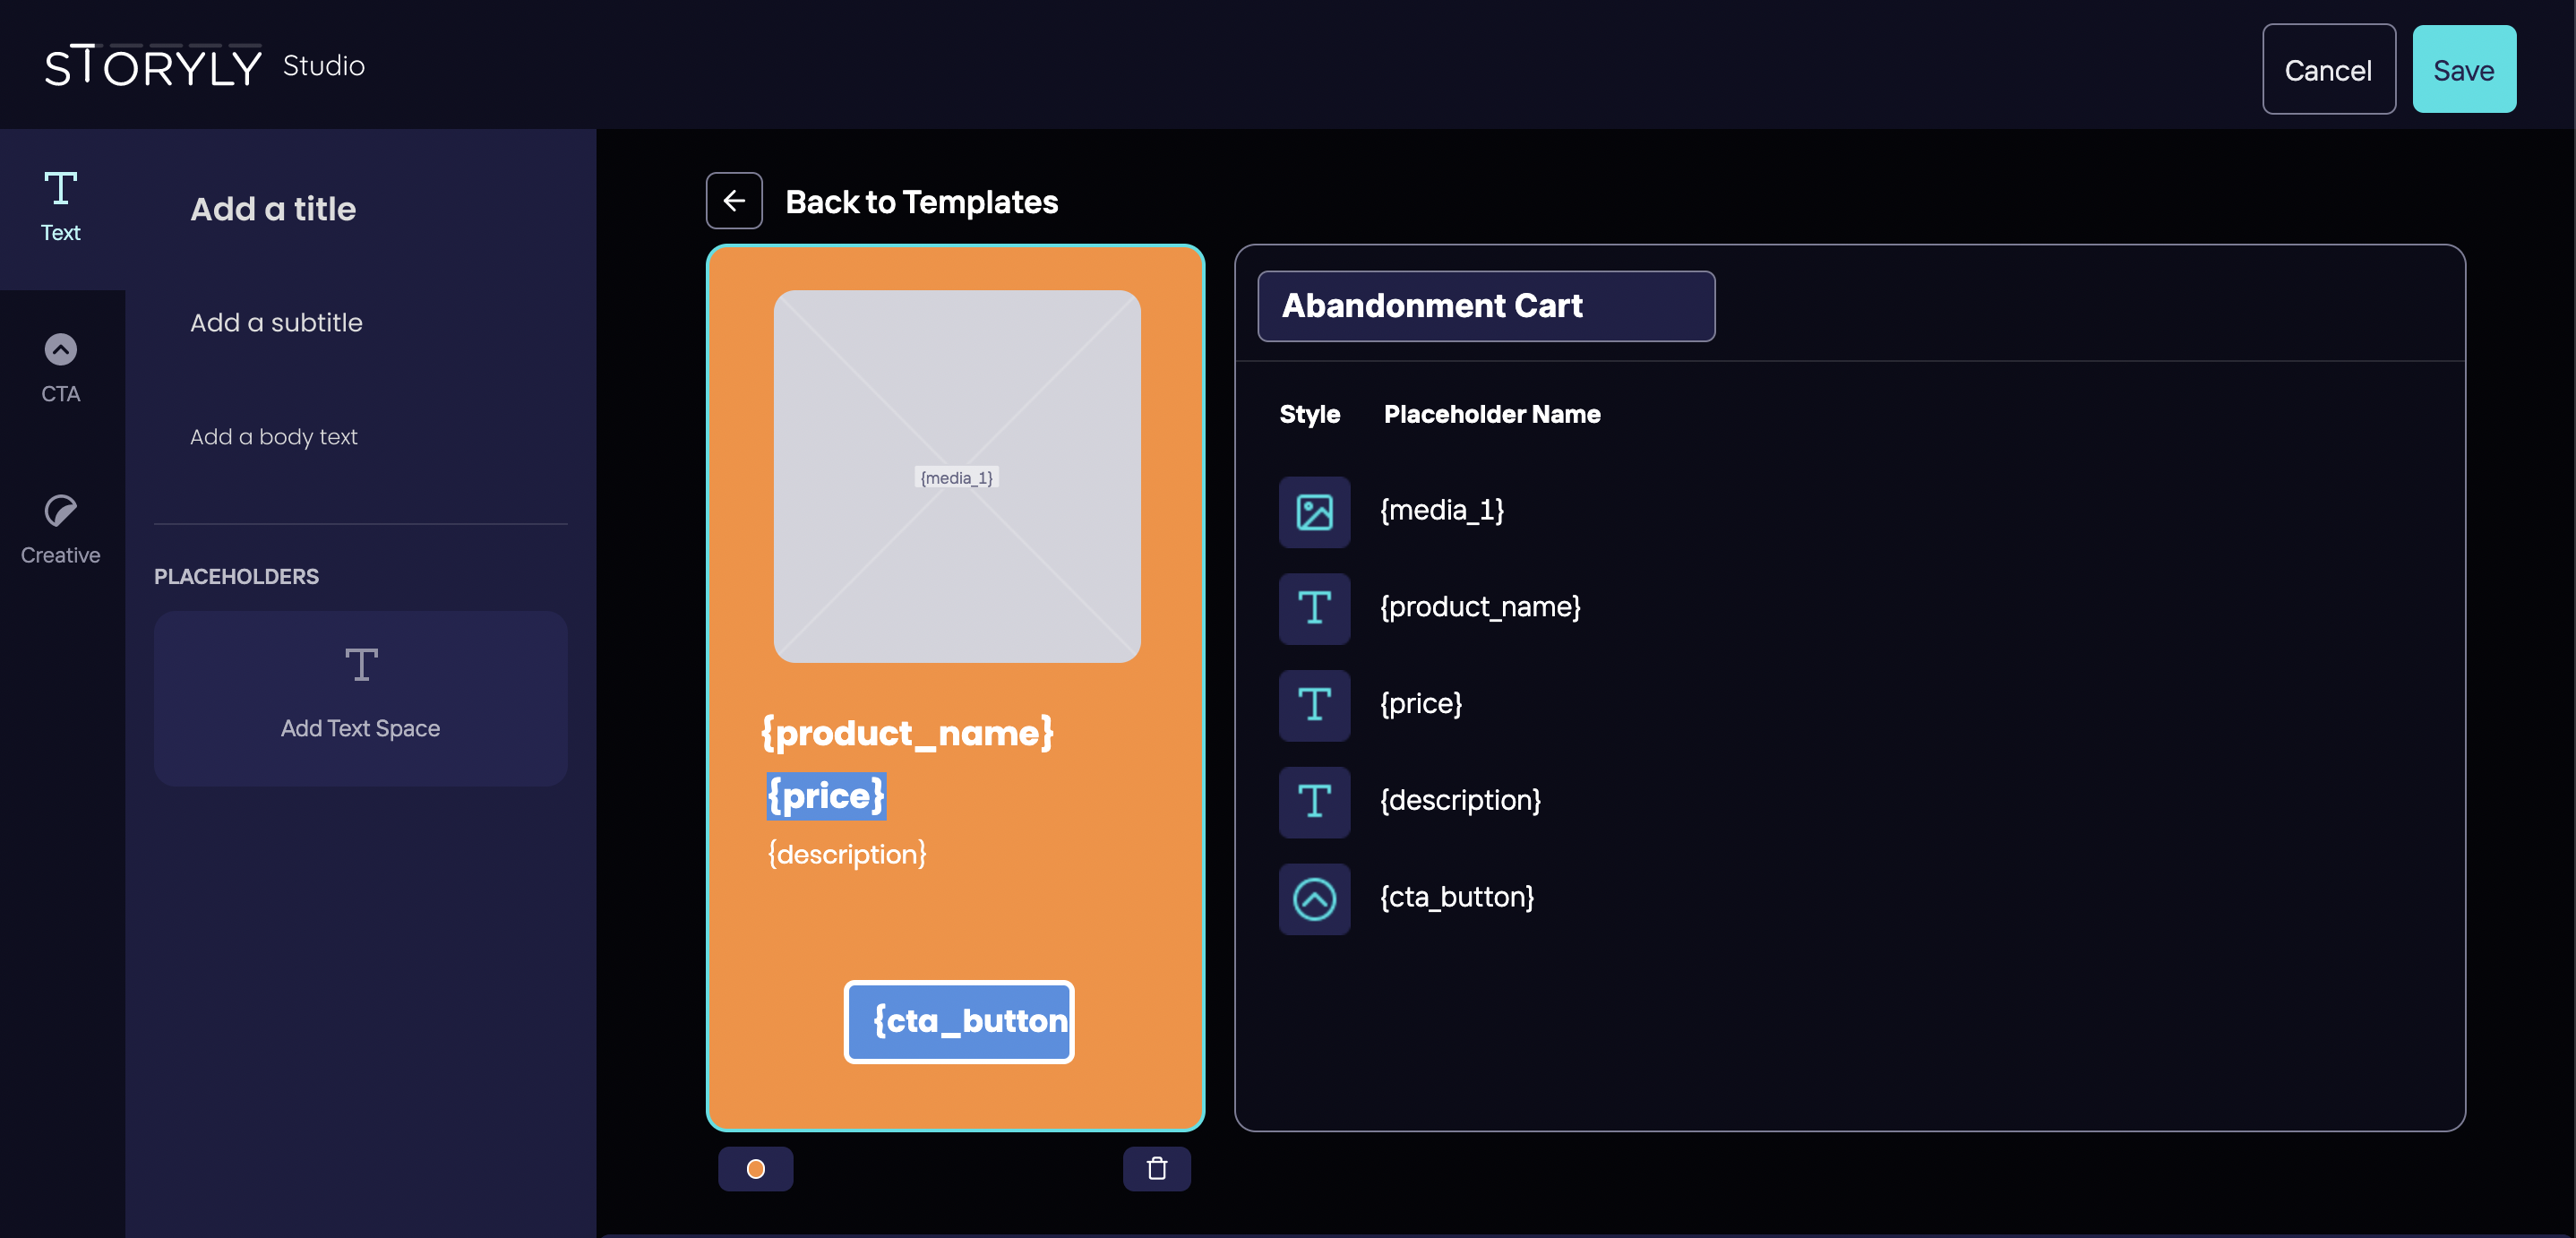
Assume that your second template is an Abandonment Cart Template and consists of the following user-defined keys;
- image layer to show image of product with
{media_1}field, - text layer to show name of product with
{product_name}field, - text layer to show price of product with
{price}field, - text layer to show description of product with
{description}field, - button layer to handle user action with
{cta_button}field, - button layer to handle user action with
{cta_url}field
Tip
After saving your template, you can set a number in Maximum number of stories to specify how many stories will be displayed in Story Group. The number of stories varies depending on the data you send.
# External Data Structure
According to the templates' needs, the Web application sets a custom data in a map format so that Storyly Web SDK can fill the fields in the templates above and show the rendered stories to the user. You may set your external data while initializing the Storyly Web SDK:
storylyWeb.init({
  ...
  externalData: externalData // it must be Array,
});
or you can use the following function/method to set the external data:
storylyWeb.setExternalData(externalData) // it must be Array.
You need to make sure that the templates' placeholders must match the structure in the external data attributes.
const externalData = [{
    "{user_name}": "user_name_url",
    "{media_2}": "media_url_2",
    "{media_1}": "media_url_1",
    "{product_name}": "product_name_url"
    "{price}": "price_url",
    "{description}": "description_url"
    "{cta_button}": "Buy Now",
    "{cta_url}": "cta_url_info"
},
{
    "{media_1}": "media_url_1",
    "{product_name}": "product_name_url"
    "{price}": "price_url",
    "{description}": "description_url"
    "{cta_button}": "Buy Now",
    "{cta_url}": "cta_url_info"
}];
Each index of the external data represents the index of stories in each story groups. For instance, first index of the list fills first stories of each story groups. Second index of the list fills second stories of each story groups and so on.
In our use case:
The field names of Birthday Story Template are listed in the first index thus Storyly SDK will fill the template and the Birthday Story will be displayed in the first story of the story group if {media_2} and {user_name} data are provided by external data.
The field names of Abandonment Cart Template are listed in both indexes thus Storyly Web SDK will fill the template and the Abandonment Cart Story will be displayed in the first and second stories of the story group if {media_1}, {product_name}, {price}, {description}, {cta_button}, and {cta_url} data are provided by external data.
WARNING
If you miss a field in an index of your external data, respective story to that index will be ignored.